
Date: 2024-08-19 || Views: 521
Getting Started with Remote File Sync: A Beginner's Guide to Installing and Setting Up the VS Code Extension
Welcome to the ultimate guide on getting started with the Remote File Sync extension for Visual Studio Code! Whether you're managing files across multiple servers or simply need an efficient way to sync your local projects with remote systems, this extension is designed to streamline your workflow. This guide will walk you through the installation process, setting up connections, and configuring your first sync operation.
Step 1: Installing the Remote File Sync Extension
To begin, you'll need to install the Remote File Sync extension from the Visual Studio Code Marketplace. Start by launching Visual Studio Code on your machine. Navigate to the Extensions Marketplace by clicking on the Extensions icon in the Activity Bar on the side of the window. In the search bar, type "Remote File Sync" and hit Enter. Find the Remote File Sync extension in the results and click the "Install" button. Once installed, you'll be ready to set up your remote connections.
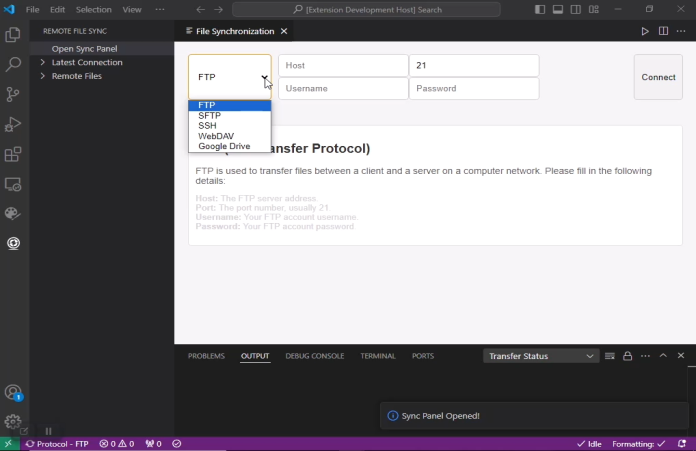
Step 2: Setting Up a Remote Connection
The Remote File Sync extension supports various protocols like FTP, SFTP, SSH, WebDAV, and Google Drive. To configure your first connection, open the Command Palette by pressing Ctrl + Shift + P in VS Code. Start typing "Remote File Sync" and select the "Open File Synchronization Panel" option from the list. This will open a "File Synchronization panel". You’ll be prompted to choose the protocol that matches your remote server. After choosing the protocol, provide the necessary details such as host, port, username, and password. If you're using SSH keys for authentication, you can specify the path to your private key. Once you've entered the details, click "Connect" to ensure everything is configured correctly. You should receive a success message if the connection is established.
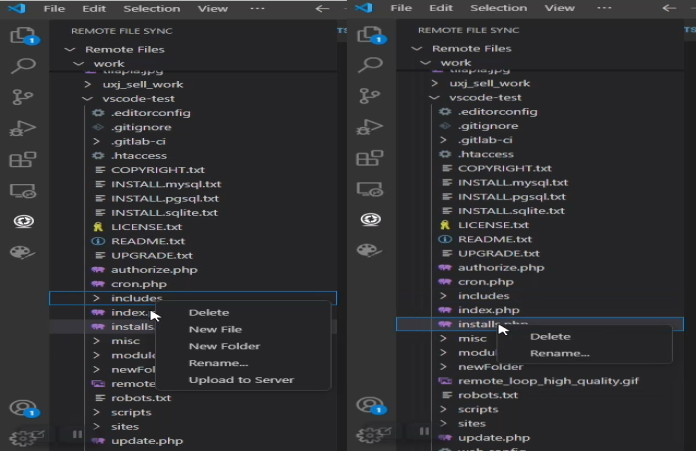
Step 3: Retrieving Your Server Files
Once your connection is set up, the next step is to load your server files and folders into the VS Code tree view. After initiating the connection, and once you see the confirmation message, navigate to the "Latest Connection" section in the Remote File Sync panel. This will expand to display various protocols such as FTP, SFTP, SSH, WebDAV, and Google Drive.
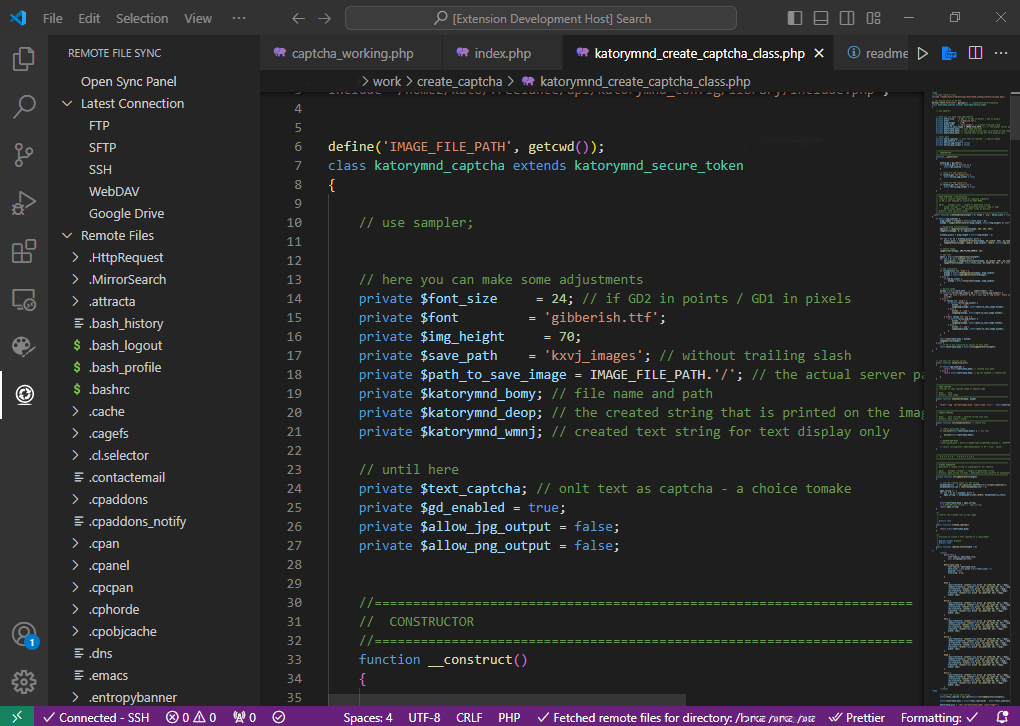
Select the protocol you used for your initial connection. For example, if you connected via FTP, click on "FTP." When you see the message "FTP Connection to server initiated," proceed by selecting "Remote Files." This action will load your server files into the VS Code tree view, allowing you to manage them directly within the editor.
Step 4: Executing Your First Sync Operation
With everything configured, you're now ready to execute your first sync operation. As the sync process runs, a detailed log will display the actions being performed, including files being uploaded, downloaded, or updated. After the sync is complete, take a moment to verify that the files have been accurately synchronized between your local and remote directories to ensure everything is working as expected.
Step 5: Leveraging Advanced Features and Customization
Remote File Sync includes several advanced features to enhance your workflow. One such feature is connection pooling, which allows you to manage multiple connections efficiently without the need to re-authenticate each time. The extension also offers conflict resolution capabilities, automatically handling file conflicts according to customizable rules. Take advantage of these features to further streamline and optimize your file synchronization process.
Conclusion
Congratulations! You've successfully installed and configured the Remote File Sync extension for Visual Studio Code. With this powerful tool at your fingertips, you can now manage and sync your files effortlessly across multiple remote servers. If you encounter any issues or have questions, feel free to reach out through our support channels or consult the official documentation. Thank you for choosing Remote File Sync. Happy coding!

Discover how AI is revolutionizing web development, from automated coding...

Katorymnd Portfolio
Here is how I helped my clients reach their goals. Click on the portfolio websites.
Fishman's Fresh Fish Delivery

A custom-built PHP website for online fresh tilapia home delivery.

Online interracial local singles dating site.

Drupal website built for online dating.
Remote File Sync - VS Code Extension
A VS Code extension to manage and synchronize your remote and local files efficiently, supporting FTP, SFTP, SSH, WebDAV, and Google Drive connections.
Katorymnd Reaction Process - WordPress Plugin
A WordPress plugin that introduces a dynamic and interactive layer to your site, allowing users to express their feelings and thoughts on your content through a variety of reaction options.
pawaPay SDK - Payment Integration
The pawaPay SDK provides seamless mobile money integration into your PHP applications, enabling smooth transaction processing with powerful API features.
Pesapal SDK - Payment Gateway Integration

A robust PHP SDK for integrating with Pesapal's payment gateway, providing seamless transaction handling for card payments
Get started now
© Copyright 2025 - Katorymnd Web Solutions - All Rights Reserved. Registered with Uganda Registration Services Bureau.